Introduction
Artificial grass offers a beautiful, low-maintenance alternative to natural lawns, providing lush greenery year-round without the hassle of mowing, watering, or fertilizing. Achieving a flawless artificial grass installation requires careful planning, the right materials, and precise techniques. This comprehensive guide will walk you through the steps to ensure your artificial lawn looks pristine and remains durable for years to come.
Benefits of Artificial Grass
- Low Maintenance: No need for mowing, watering, or fertilizing.
- Durable: Resistant to wear and tear, suitable for heavy foot traffic.
- Eco-Friendly: Reduces water usage and eliminates the need for chemical fertilizers and pesticides.
- All-Weather Use: Stays green and usable in all weather conditions.
Steps for Achieving Flawless Artificial Grass Installation
Step 1: Planning and Measuring
Before you begin, plan your project carefully. Measure the area where you want to install the artificial grass to determine how much material you will need. Consider the layout, including any curves or obstacles, and plan for seams where necessary.
Step 2: Gathering Materials and Tools
You’ll need the following materials and tools for your artificial grass installation:
- Artificial grass rolls
- Weed barrier fabric
- Crushed stone or gravel
- Sand
- Adhesive and seam tape
- Stakes or nails
- Utility knife
- Shovel
- Rake
- Compactor
- Tape measure
- Level
Step 3: Preparing the Ground
A solid foundation sets the stage for a flawless artificial grass installation.


- Remove Existing Turf: Clear the area of any natural grass, weeds, rocks, and debris. Use a sod cutter for large areas to make the job easier.
- Excavate the Area: Dig down to a depth of about 3-4 inches to create a stable base. Ensure the ground is level and free of any roots or large stones.
- Install a Weed Barrier: Lay down a weed barrier fabric to prevent weed growth and ensure a clean surface for the artificial grass.
Step 4: Creating the Base
A solid base is essential for the longevity and performance of your artificial lawn.
- Add a Sub-Base: Spread a layer of crushed stone or gravel over the area to a depth of about 3 inches. This provides drainage and stability.
- Compact the Sub-Base: Use a compactor to compress the sub-base firmly. A well-compacted base prevents settling and ensures a smooth surface.
- Apply a Sand Layer: Spread a thin layer of sand over the compacted sub-base to create a level surface. Use a rake to distribute the sand evenly, and compact it again.
Step 5: Laying the Artificial Grass
- Roll Out the Grass: Unroll the artificial grass and lay it over the prepared base. Allow the grass to acclimate for a few hours to expand and settle naturally.
- Trim to Fit: Use a utility knife to trim the edges of the grass to fit the area precisely. Make sure to cut around any obstacles and create clean seams where necessary.
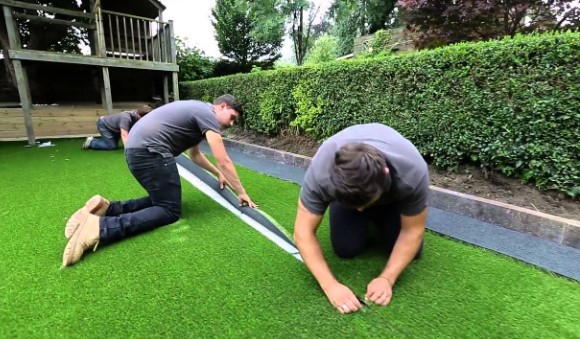
- Join the Seams: If your installation requires multiple rolls of grass, join the seams using seam tape and adhesive. Align the edges carefully and press down firmly to ensure a seamless appearance.
Step 6: Securing the Grass
- Secure the Edges: Use stakes or nails to secure the edges of the artificial grass. Place them approximately 6 inches apart to keep the grass firmly in place.
- Brush the Grass: Use a stiff-bristled broom to brush the grass fibers against the grain. This helps the blades stand upright and gives the lawn a natural look.
- Add Infill (Optional): For added stability and to help the grass blades stand up, you can add a layer of infill material such as silica sand or rubber granules. Spread the infill evenly and brush the grass again to work it into the fibers.
Step 7: Final Touches
- Check for Smoothness: Inspect the entire installation to ensure the surface is smooth and level. Make any necessary adjustments.
- Clean Up: Remove any excess materials and debris from the area. Give the grass one final brush to lift the fibers.
Step 8: Maintenance Tips
While artificial grass requires minimal maintenance, a few simple practices can keep it looking its best:
- Regular Brushing: Brush the grass periodically to keep the fibers upright and prevent matting.
- Remove Debris: Clear away leaves, twigs, and other debris to maintain a clean appearance.
- Rinse as Needed: Occasionally rinse the grass with water to remove dust and pet urine.
- Check Edges: Inspect the edges and seams periodically to ensure they remain secure. Consider hiring professional landscapers for comprehensive maintenance services and repairs as needed.
Conclusion
Achieving a flawless artificial grass installation involves careful planning, proper ground preparation, and attention to detail. By following these steps, you can create a beautiful, low-maintenance lawn that enhances your outdoor space and provides years of enjoyment. Invest in high-quality materials and take the time to install your artificial grass correctly to ensure it remains pristine and durable.